Indulging in a velvety, ice-cold milkshake is one of life’s simple pleasures. Whether you’re a seasoned milkshake connoisseur or a novice looking to perfect your technique, mastering the art of crafting the perfect milkshake can elevate your dessert game to new heights. From selecting premium ingredients to perfecting your blending technique, this comprehensive guide will equip you with the knowledge and skills to create restaurant-quality milkshakes in the comfort of your own kitchen.
Essential equipment for crafting perfect milkshakes
Before diving into the world of milkshake creation, it’s crucial to ensure you have the right tools at your disposal. The foundation of any great milkshake lies in the equipment used to blend and serve it. A high-quality blender is the cornerstone of milkshake preparation, capable of crushing ice and creating smooth, creamy textures with ease.
When selecting a blender, opt for one with multiple speed settings and a powerful motor, ideally 600 watts or higher. This will allow you to achieve the perfect consistency without overworking the ingredients. Additionally, look for a blender with a wide, sturdy base to prevent tipping during operation.
Beyond the blender, other essential items include:
- Tall, chilled glasses for serving
- Long-handled spoons for mixing and enjoying
- Straws (preferably reusable or biodegradable)
- An ice cream scoop for precise portioning
- A reliable freezer for storing ice cream at the optimal temperature
Investing in quality equipment will not only make the milkshake-making process more enjoyable but also contribute significantly to the final product’s texture and presentation.
Selecting premium ingredients for gourmet milkshakes
The secret to an exceptional milkshake lies in the quality of its ingredients. While it’s tempting to cut corners, using premium components will elevate your milkshake from good to extraordinary. Let’s explore the key ingredients that form the foundation of a gourmet milkshake.
Artisanal ice cream varieties: from gelato to frozen custard
The backbone of any milkshake is, undoubtedly, the ice cream. Opting for high-quality, artisanal ice cream can make a world of difference in both flavour and texture. Consider exploring beyond traditional ice cream and experiment with gelato, which offers a denser, silkier texture, or frozen custard, known for its rich, creamy consistency.
When selecting ice cream, look for varieties with a high butterfat content, typically between 14% and 18%. These premium ice creams will result in a luxuriously smooth milkshake. Avoid ice creams with excessive air whipped into them , as these can lead to a less satisfying texture in the final product.
Milk alternatives: enhancing flavour with oat, almond, and coconut bases
While traditional milkshakes call for whole milk, experimenting with alternative milk bases can add unique flavours and cater to dietary preferences. Oat milk, for instance, offers a creamy texture and subtle sweetness that complements many ice cream flavours. Almond milk can provide a nutty undertone, while coconut milk imparts a tropical essence perfect for fruity milkshakes.
When using milk alternatives, be mindful of their fat content and consistency. You may need to adjust the ratio of milk to ice cream to achieve the desired thickness. Remember that some plant-based milks may alter the flavour profile of your milkshake , so choose one that harmonizes with your chosen ice cream variety.
Flavour enhancers: extracts, syrups, and natural fruit purées
To take your milkshake to the next level, consider incorporating flavour enhancers. Pure vanilla extract can add depth to almost any milkshake, while specialty extracts like peppermint or almond can create unique flavour combinations. High-quality syrups, such as salted caramel or dark chocolate, can intensify the milkshake’s flavour profile.
For fruit-based milkshakes, opt for natural fruit purées or fresh, ripe fruits. These will provide authentic flavours and vibrant colours without the need for artificial additives. Avoid using fruit juices as they can water down the milkshake and compromise its creamy texture .
Mastering milkshake consistency: blending techniques
Achieving the perfect milkshake consistency is an art that requires practice and attention to detail. The blending process is crucial in determining the final texture of your milkshake, and mastering various techniques will allow you to create a range of consistencies to suit different preferences.
Pulse blending vs continuous blending: impact on texture
The choice between pulse blending and continuous blending can significantly affect your milkshake’s texture. Pulse blending involves short bursts of power, giving you more control over the consistency and helping to prevent over-blending. This technique is particularly useful when incorporating solid mix-ins like cookies or fruit pieces, as it allows you to maintain some texture in the final product.
Continuous blending, on the other hand, is ideal for creating ultra-smooth milkshakes. This method is perfect for breaking down ice crystals and ensuring a uniform consistency throughout the drink. However, be cautious not to over-blend, as this can lead to a thin, runny milkshake .
Temperature control: achieving the ideal viscosity
Temperature plays a crucial role in milkshake consistency. For optimal results, ensure your ice cream is at the right temperature before blending. Ice cream that’s too hard will result in a chunky texture, while overly soft ice cream can lead to a thin milkshake.
To achieve the ideal viscosity:
- Remove ice cream from the freezer 5-10 minutes before blending
- Chill your blender jar and serving glasses in the freezer for 15 minutes
- Use cold milk to maintain the milkshake’s temperature during blending
- Blend quickly to prevent the mixture from melting too much
- Serve immediately for the best texture and temperature
Emulsification methods for smoother milkshakes
Emulsification is key to creating a smooth, well-integrated milkshake. To enhance emulsification, consider adding a small amount of an emulsifying agent such as lecithin or a touch of neutral oil. These additives help bind the fat molecules in the ice cream with the liquid milk, resulting in a more stable and smoother texture.
Another effective method is to start blending with just a small amount of milk, gradually adding more as you blend. This technique allows the ice cream to break down slowly, incorporating air and creating a creamier consistency. Remember to scrape down the sides of the blender occasionally to ensure all ingredients are thoroughly combined .
Classic milkshake recipes with a modern twist
While traditional milkshake flavours like vanilla, chocolate, and strawberry will always have their place, experimenting with unique combinations can lead to exciting new favourites. Here are some classic recipes with a contemporary spin:
Salted Caramel Pretzel Milkshake : Blend vanilla ice cream with a generous swirl of salted caramel sauce. Add a handful of crushed pretzels for a salty crunch, and top with whipped cream and a caramel drizzle.
Matcha Green Tea Milkshake : Combine premium vanilla ice cream with high-quality matcha powder for a vibrant, antioxidant-rich treat. Garnish with a sprinkle of matcha powder and a fan-shaped wafer cookie.
Lavender Honey Milkshake : Infuse milk with dried lavender flowers, then strain and blend with vanilla ice cream and a drizzle of local honey. Top with a sprinkle of culinary lavender buds for an aromatic finish.
Spiced Pumpkin Pie Milkshake : Blend pumpkin pie filling with vanilla ice cream and a dash of pumpkin pie spice. Rim the glass with crushed graham crackers and top with cinnamon whipped cream.
Experimenting with unexpected flavour combinations can lead to truly memorable milkshake creations. Don’t be afraid to push the boundaries and let your culinary creativity shine.
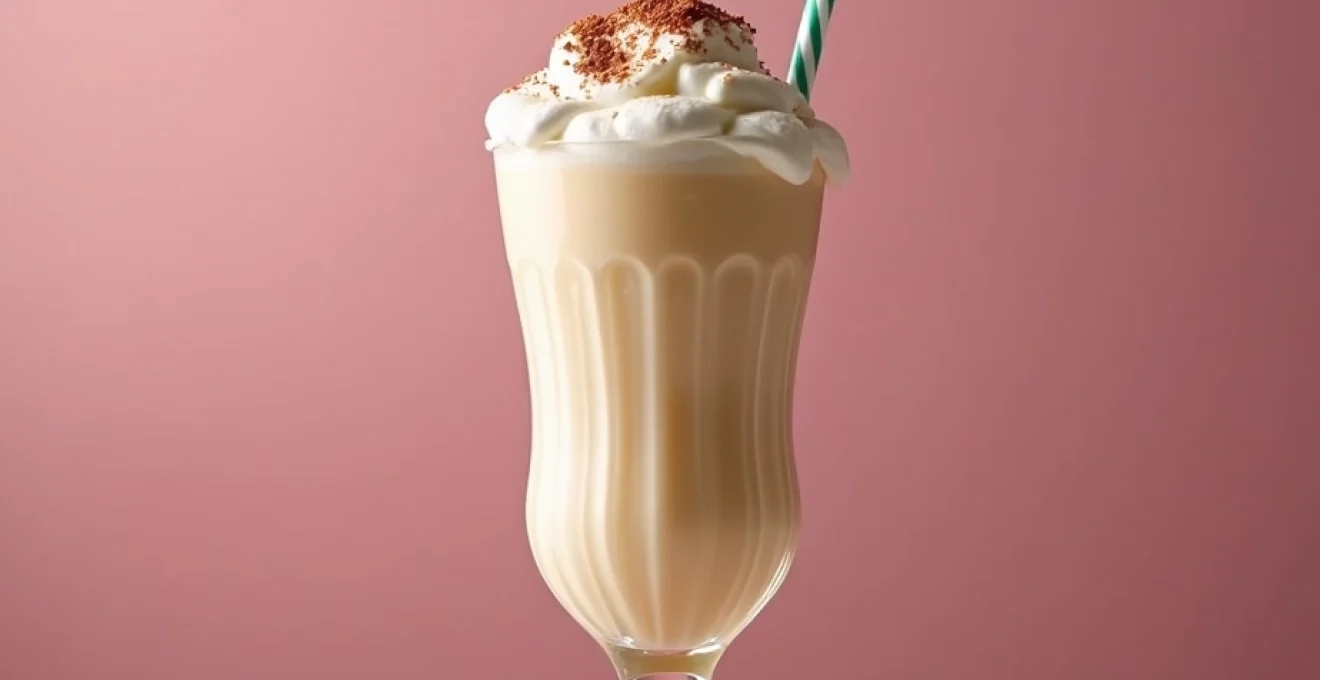
Garnishing and presentation: elevating your milkshake game
The visual appeal of a milkshake is almost as important as its taste. A well-garnished and beautifully presented milkshake can turn a simple dessert into an Instagram-worthy masterpiece. Let’s explore some techniques to take your milkshake presentation to the next level.
Edible toppings: from torched marshmallows to gold leaf
Elevate your milkshake with an array of eye-catching and delicious toppings. Consider these options:
- Torched marshmallows for a caramelized, smoky sweetness
- Edible gold leaf for a touch of luxury
- Candied fruit slices for a burst of color and flavor
- Artisanal chocolate shavings or curls
- House-made brittle or praline for added crunch
When selecting toppings, consider how they complement the flavour profile of your milkshake. Aim for a balance of textures and tastes to create a multi-dimensional experience .
Glassware selection: enhancing visual appeal
The right glassware can significantly enhance the visual appeal of your milkshake. Classic soda fountain glasses offer a nostalgic touch, while mason jars provide a rustic, casual feel. For a more elegant presentation, consider using tall, slender glasses or even martini glasses for dessert-inspired milkshakes.
Regardless of the style, ensure your glassware is chilled before serving to maintain the milkshake’s temperature and prevent premature melting. Consider rimming the glass with complementary ingredients like crushed cookies, colored sugar, or even flavored salts for savory-sweet combinations .
Layering techniques for Instagram-Worthy milkshakes
Creating visually stunning layered milkshakes requires patience and precision. To achieve perfect layers:
- Start with a base layer of your main milkshake flavor
- Carefully spoon in contrasting layers of flavored syrups or purées
- Use the back of a spoon to gently pour each layer, preventing mixing
- Freeze briefly between layers for more defined separation
- Top with whipped cream and garnishes for added height and visual interest
For an extra wow factor, consider creating a drip effect by allowing thick sauces to cascade down the inside of the glass before adding the milkshake mixture.
Troubleshooting common milkshake preparation issues
Even experienced milkshake makers can encounter challenges. Here are some common issues and their solutions:
| Problem | Possible Cause | Solution |
|---|---|---|
| Too thin consistency | Overblending or too much milk | Add more ice cream or freeze briefly |
| Lumpy texture | Ice cream too cold or insufficient blending | Let ice cream soften slightly or blend longer |
| Separation of ingredients | Poor emulsification or temperature differences | Add an emulsifier or blend ingredients at similar temperatures |
| Lack of flavor | Low-quality ingredients or improper ratios | Use premium ingredients and adjust flavoring amounts |
Remember that practice makes perfect when it comes to milkshake preparation. Don’t be discouraged by initial setbacks; instead, view them as opportunities to refine your technique and create even better milkshakes in the future.
The key to resolving milkshake issues lies in understanding the science behind ingredient interactions and being willing to make adjustments on the fly.
By mastering the art of milkshake making, you’ll be able to create delightful, creamy treats that rival those of high-end ice cream parlors. From selecting the finest ingredients to perfecting your blending technique and presentation skills, each step contributes to the ultimate milkshake experience. So grab your blender, choose your favorite flavors, and start experimenting – a world of delicious possibilities awaits!